Protecting your vehicle’s paint doesn’t have to be expensive or complicated. With today’s advanced materials and precut kits, installing PPF film has become a practical DIY project for anyone who wants to keep their car looking showroom-new.
Whether you drive a sports car, a daily commuter, or a rugged SUV, paint protection film offers an invisible barrier against rock chips, scratches, road grime, and harmful UV rays.
In this guide, we’ll cover everything you need to know about installing precut paint protection film — from prepping your workspace and choosing the right tools to step-by-step instructions and post-installation care.
If you want to extend the life of your paint and save money by skipping the shop, this blog will help you do it right the first time.
Why choose precut paint protection film?
If you want to protect your vehicle’s finish without the hassle, precut paint protection film is the smart choice. Unlike bulk rolls that require measuring, trimming, and shaping by hand, precut kits are laser-cut to match your specific make, model, and year. That means every piece fits your vehicle’s curves, edges, and contours with pinpoint accuracy.
This precise fit dramatically reduces installation time and minimizes mistakes like uneven edges, trapped bubbles, or over-stretching. Whether you're a seasoned DIYer or installing paint protection for the first time, precut film makes the process faster, cleaner, and less intimidating.
Choosing precut paint protection film also ensures you get consistent, professional-looking results without paying pro-shop prices. You’ll avoid the cost of custom cutting, eliminate waste from unused material, and protect the areas that matter most — from your hood and bumpers to mirrors and door edges.
It’s everything you want in a protective solution: convenience, precision, and high-quality coverage, all rolled into one kit made specifically for your car.

What you’ll need before you start
Installing precut paint protection film at home is totally doable, but preparation is everything. Having the right tools and setting up a clean environment will make your job smoother and give you more professional-looking results.
Essential tools and supplies
Before you even peel the liner off your film, gather the following items:
· Precut paint protection film kit – Make sure it's specifically designed for your vehicle’s make and model.
· Spray bottles – You’ll need two:
o One filled with slip solution (distilled water + a few drops of dawn dish soap)
o One with a tack solution (usually 70% isopropyl alcohol + distilled water)
· Squeegee – Use one with a soft edge to smooth the film and push out air bubbles and water.
· Microfiber towels – These are for wiping down surfaces without leaving lint.
· Lint-free gloves – To avoid fingerprints or oils transferring to the film or paint.
· Clay bar – This is optional but helpful for removing embedded debris before installation.
· Heat gun or hair dryer – These are useful for helping the film conform to curved areas like bumpers or side mirrors.
Prep your workspace
Where you install the film matters as much as how you install it.
Choose a clean, dust-free garage or shaded area. Wind and dust trap particles under the film.
The ideal installation temperature is between 60°F and 80°F — too cold and the film won’t stretch; too hot and it may become sticky too fast.
Make sure the vehicle is completely clean and dry. Wash it thoroughly, remove any wax or sealants, and wipe down the areas where the film will go with an alcohol-based cleaner.
Getting everything ready before you start is the difference between a frustrating mess and a clean, satisfying install. With these tools and a clean environment, you’ll have what you need to install your precut paint protection film correctly.
How to prepare your vehicle for paint protection film installation
A flawless PPF install starts with one thing: a clean, contaminant-free surface. Even the best precut paint protection film won’t stick or lay flat if your paint is dirty, greasy, or covered in debris. Prepping your vehicle properly ensures the film adheres smoothly, stays bubble-free, and lasts longer.
Step 1: Wash your car thoroughly
Use a pH-balanced car shampoo and wash the vehicle by hand to remove all dirt, grime, and road film. Avoid drive-through car washes, as they can leave wax residue or water spots. Rinse thoroughly and dry using clean microfiber towels.

Step 2: Use a clay bar on application areas (optional but recommended)
Even freshly washed cars might have embedded contaminants like sap, brake dust, or tar. A clay bar helps remove these particles, leaving the surface ultra-smooth.
You’ll spray the panel with a clay lubricant or soap-water mix. Next, gently glide the clay bar across the paint. Finally, wipe with a clean microfiber towel.
This step helps prevent windshield fogging from trapped particles and ensures the film bonds cleanly to the surface.
Step 3: Wipe down with an isopropyl alcohol mix
Once the car is clean, spray a 50/50 mix of isopropyl alcohol and distilled water onto the areas where you’ll install the film. This removes any leftover waxes, oils, or soaps that could interfere with adhesion.
Use a fresh microfiber towel and make sure the surface is streak-free and dry before applying the film.
Step 4: Keep your hands and tools clean
Wear lint-free gloves or wash your hands to avoid transferring oils to the film or paint. Clean your squeegee, spray bottles, and workspace to avoid introducing dust or debris during installation
A properly prepared surface is critical to getting smooth, long-lasting results with precut paint protection film. Once your car is spotless, smooth, and oil-free, you’re ready to start applying the film.
Step-by-step installation guide
Once your vehicle is fully prepped and your tools are ready, it’s time to install your precut paint protection film. Take your time, follow these steps carefully, and you’ll have a clean, professional-looking result — even if you’re doing it at home for the first time.
Step 1: Choose your starting panel
Start with a simple, flat panel, like the hood or a fender. This will give you a feel for the material before moving on to more complex areas.
Step 2: Apply slip solution to the panel
Generously spray the panel with your slip solution (distilled water + a few drops of baby shampoo). This prevents the film from sticking immediately and gives you flexibility to reposition it.
Step 3: Peel and spray the adhesive side of the film
Carefully peel the liner off the precut paint protection film, exposing the adhesive side. As you peel, spray the adhesive side with the slip solution to keep it hydrated and prevent premature sticking.
Pro tip: Peel back only as much film as you need for that section — don’t let the whole piece dangle.
Step 4: Align the film with the panel
Place the wet adhesive side onto the wet panel. Move the film around until it lines up with the edges, curves, or cutouts. Precut PPF film fits perfectly, so it should match up without trimming.

Step 5: Squeegee from the center outward
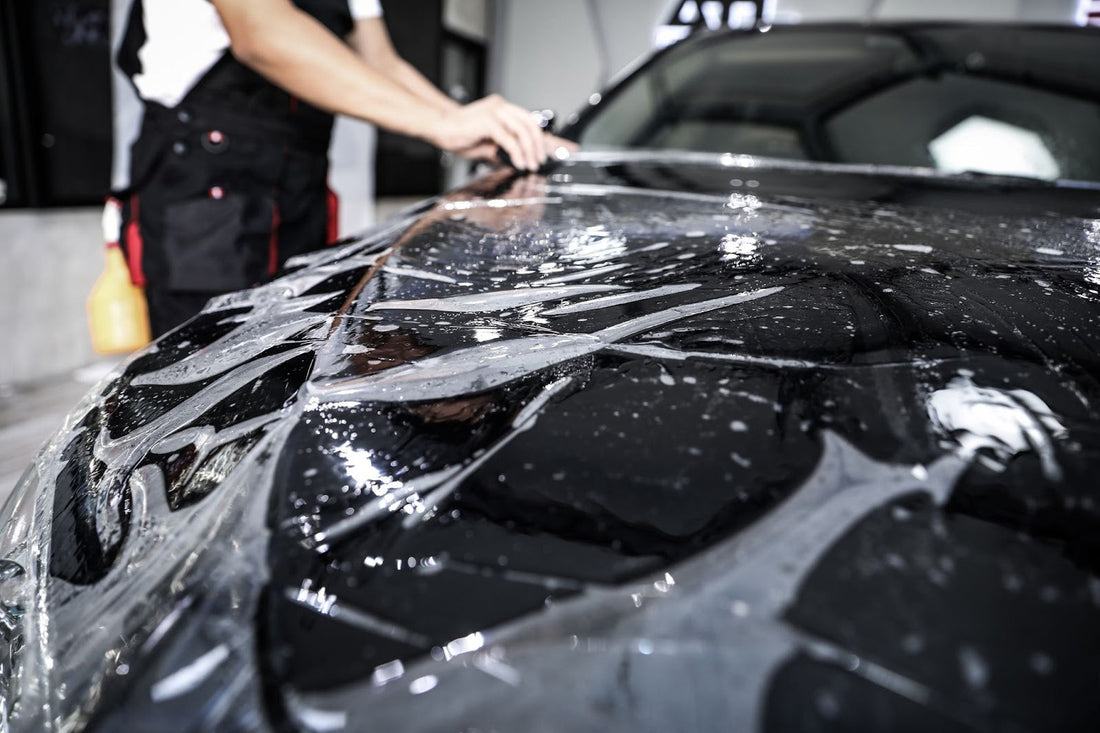
Once aligned, use your soft-edge squeegee to push the slip solution and air out from under the film. Start in the middle and work outward in overlapping strokes. Use firm, even pressure and wipe your squeegee between passes. If bubbles form, gently lift that section, reapply slip solution, and reset.
Step 6: Use heat for curves or edges
If the panel has a curve or recessed area (like bumpers or mirrors), apply light heat with a heat gun or hair dryer. This softens the film, making it more pliable and easier to stretch slightly to fit contours.
Don’t overheat. Gentle warmth is all you need.
Step 7: Press down edges and corners
Once the film is in place and most of the moisture has been pushed out, apply gentle heat and pressure along the edges to help them lay flat and seal. If an edge starts to lift, use tack solution (alcohol-heavy mix) to help it grip. Squeegee again and apply light heat to set.
Step 8: Let it rest and dry
Once you’ve fully installed the panel, let it sit undisturbed for 10–20 minutes before moving to the next section. Avoid wiping or disturbing the film while it settles. Don’t wash the vehicle for at least five to seven days to allow full adhesion.
Repeat these steps for each panel in your precut PPF film kit, working in small, manageable sections. The key to success is patience, attention to detail, and using plenty of slip solution throughout the process.
Once complete, you’ll have durable, nearly invisible protection that defends your paint from chips, stains, and daily wear.
Common mistakes to avoid when installing PPF film
Even with a perfectly cut kit and all the right tools, mistakes can still happen if you're not careful. If this is your first time installing PPF film, avoiding these common errors will help you get cleaner results and longer-lasting protection.
1. Skipping surface prep
This is the most critical step — and the one most often rushed. The film won't adhere properly if the paint isn’t spotless and free of oils, wax, or debris. Trapped dirt can also create unsightly bumps and bubbles. Always wash thoroughly, clay bar if needed, and finish with an alcohol wipe before applying anything.
2. Not using enough slip solution
One of the most preventable problems when installing PPF film is using too little slip solution. This soapy water mix allows you to slide the film into position before it sticks. Without enough lubrication, the film can grab the paint too early, stretch, or crease before you’re ready to squeegee it down.
3. Rushing the squeegee process
Don’t force it. Pressing too hard, moving too fast, or trying to remove all moisture in one pass can damage the film or leave bubbles behind. Start from the center and work outward in smooth, overlapping strokes. Take your time.
4. Ignoring heat when needed
Some panels have curves that are too tight for the film to lie flat on its own. Skipping the heat gun in these areas leads to edges lifting or wrinkling. Light, controlled heat softens the film and helps it stretch gently without damage.
5. Touching the adhesive side
Your fingers carry oils, dust, and lint, even if they seem clean. If you touch the sticky side of the film, you risk leaving smudges or particles that affect adhesion and clarity. Wear lint-free gloves or handle the edges only.
Knowing what to avoid will result in fewer mistakes and far better results. Taking a little extra care during paint protection film installation can mean the difference between a job you tolerate and a finish you’re proud of.

Protect your ride with precision — choose MotoShield Pro
Your vehicle is an investment, a reflection of your style, and something worth protecting.
Whether you're shielding a brand-new car from road debris or preserving the shine on a daily driver, installing precut paint protection film is one of the smartest ways to maintain your vehicle's finish. And with MotoShield Pro, getting that protection is easier and more effective than ever.
Our precut PPF film kits are engineered for precision. Each is laser-cut to match your exact make and model, so you don’t have to guess, trim, or struggle through complicated installs.
With the right prep and a little patience, you'll get pro-level results. It’s the perfect solution for DIYers who care about their cars and want to keep them looking flawless for the long haul.
But that’s only part of what we offer. At MotoShield Pro, we specialize in premium automotive protection — from window tints to anti-fog films, ceramic coatings, and interior care products. Every item delivers real performance, backed by quality materials and expert support.
If you're ready to take paint protection into your own hands, do it with the brand that delivers fit, finish, and function — all in one place.
Shop MotoShield Pro today for the best in precut paint protection film, and explore our full range of automotive care products built for drivers who demand more.